One of Android's most well-known points to consider in application development is the requirement to support a variety of different screen sizes and orientations in an application. The SDK is full of documentation and tools on how to help the developer best accomplish this goal; one of these tools is the 9-Patch creator.
The 9-Patch is a PNG image with some coding added that allows the Android system
to determine how the image can be stretched and contorted to meet the specific
layout constraints during use (like fill_parent and wrap_content).
It does this by taking a predefined PNG image, and allowing the user to define a
1-pixel border around the image in locations where stretching can occur.
Creating a 9-Patch
- Navigate to the
tools/directory of your SDK from a command-line. - Run
draw9patchand a window will appear. - Drag and drop and PNG image into the application window
- The image will appear with a blank 1-px border around it
- Add stretchable regions by clicking on pixels in the newly created blank
area (you will see black mark appear for each selection)
- Remove any mistakes by holding the Shift key and clicking on a marked pixel
- See below for more on this
9-Patch Theory
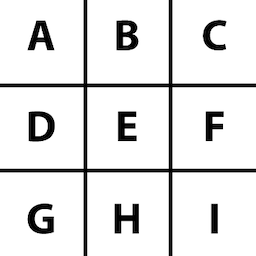
The 9-Patch gets its name from the fact that the overlay created breaks the image up into nine defined regions, organized similar to tic-tac-toe. Each region has specific stretch properties:
- Corner Regions (A,C,G,I)
- These regions are fixed and nothing inside them will stretch
- Horizontal Sides (D,F)
- The pixels in these regions will stretch vertically when necessary
- Vertical Sides (B,H)
- The pixels in these regions will stretch horizontally when necessary
- Center (E)
- The pixels in this regions will stretch in both horizontal and vertical directions equally
Draw9Patch
The draw9patch tool allows the user to define two pieces of data by applying
marks on the image border:
- Stretchable zones
- The portions of the image that are to be fixed or stretched when the image must fill or wrap in layout
- Created by marking border pieces on the TOP and LEFT of the image
- Content area
- The area portion of the image where content is to be inserted
(generally text or something applied via the
android:srcxml tag) - Created by marking border pieces on the BOTTOM and RIGHT of the image
- The area portion of the image where content is to be inserted
(generally text or something applied via the
As an example, below is what a basic patched graphic will look like inside the
draw9patch tool. The green regions define the patches that will stretch either
horizontal or vertical. The pink patch is a fully stretchable patch.
Original

Patched
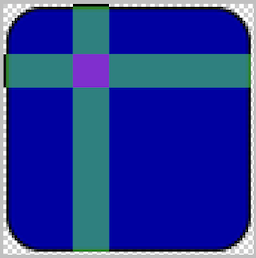
You can see how the colored regions map to the example grid shown above.
This is a simple example, but the user can create multiple regions in the same
image like so:
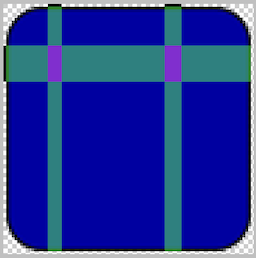
Now we have an image with multiple fixed and stretchable regions. Again, pink will stretch in both directions, green in one direction, and the rest of the image will be fixed.
A Word About Content
Defining the content area gives the user the ability to assist Android in
providing the proper location where source content (text, other images, etc.)
are placed when this image is a background or other content wrapper image.
Think of the standard Button as an example. When a user defines android:text
(or android:src on an ImageButton), this is the button content. That content
is laid out inside of the content area that was defined in the button background
image (a 9-patch, by the way).
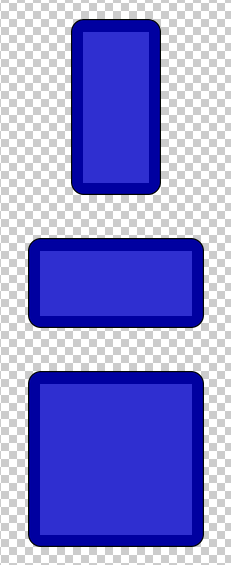
With our example, if I define a solid mark across the bottom and right of the image,
stopping just short of the rounded corners, a content area will be defined as shown
in this preview pane:
Tricks of the Tool
- Show Patches
- Turn on the visual assistance of the green/pink patch locations
- Show Content
- In the preview pane, highlight the content section that exists in each orientation
- Show Bad Patches
- Allow
draw9patchto evaluate whether you might be causing trouble by defining a stretchable area that includes components (like a piece of text or a gradient) that won't always stretch consistently. The "bad" patches are enclosed in bright red borders.
- Allow